


Color Me Confused
Or, How to Not Become Pre-Pressed for Time

Some of the biggest mistakes I see in indiecomics comes from one of a few things:
poor or no editing
poor or no professional lettering
poor pre-press and print prep
poor digital prep
This next series of posts will deal with each of these in turn. I’m probably not going to tackle them in the order above because I’m an agent of Chaos. 🤣🤣🤣
Please read the following set of posts as my best instructional articles and not a criticism too much. I don’t have all the answers, but I do have experience.1
Tonight I’m going to deal with Pre-Press and I’ll be using Affinity Designer 2 as my tool. This same set of instructions can easily be adapted for Adobe Illustrator, but it’s more fun using new toys, right?

PS — I am NOT an affiliate, but I am an owner/user.
Regardless of Platform, Know Your Specs!
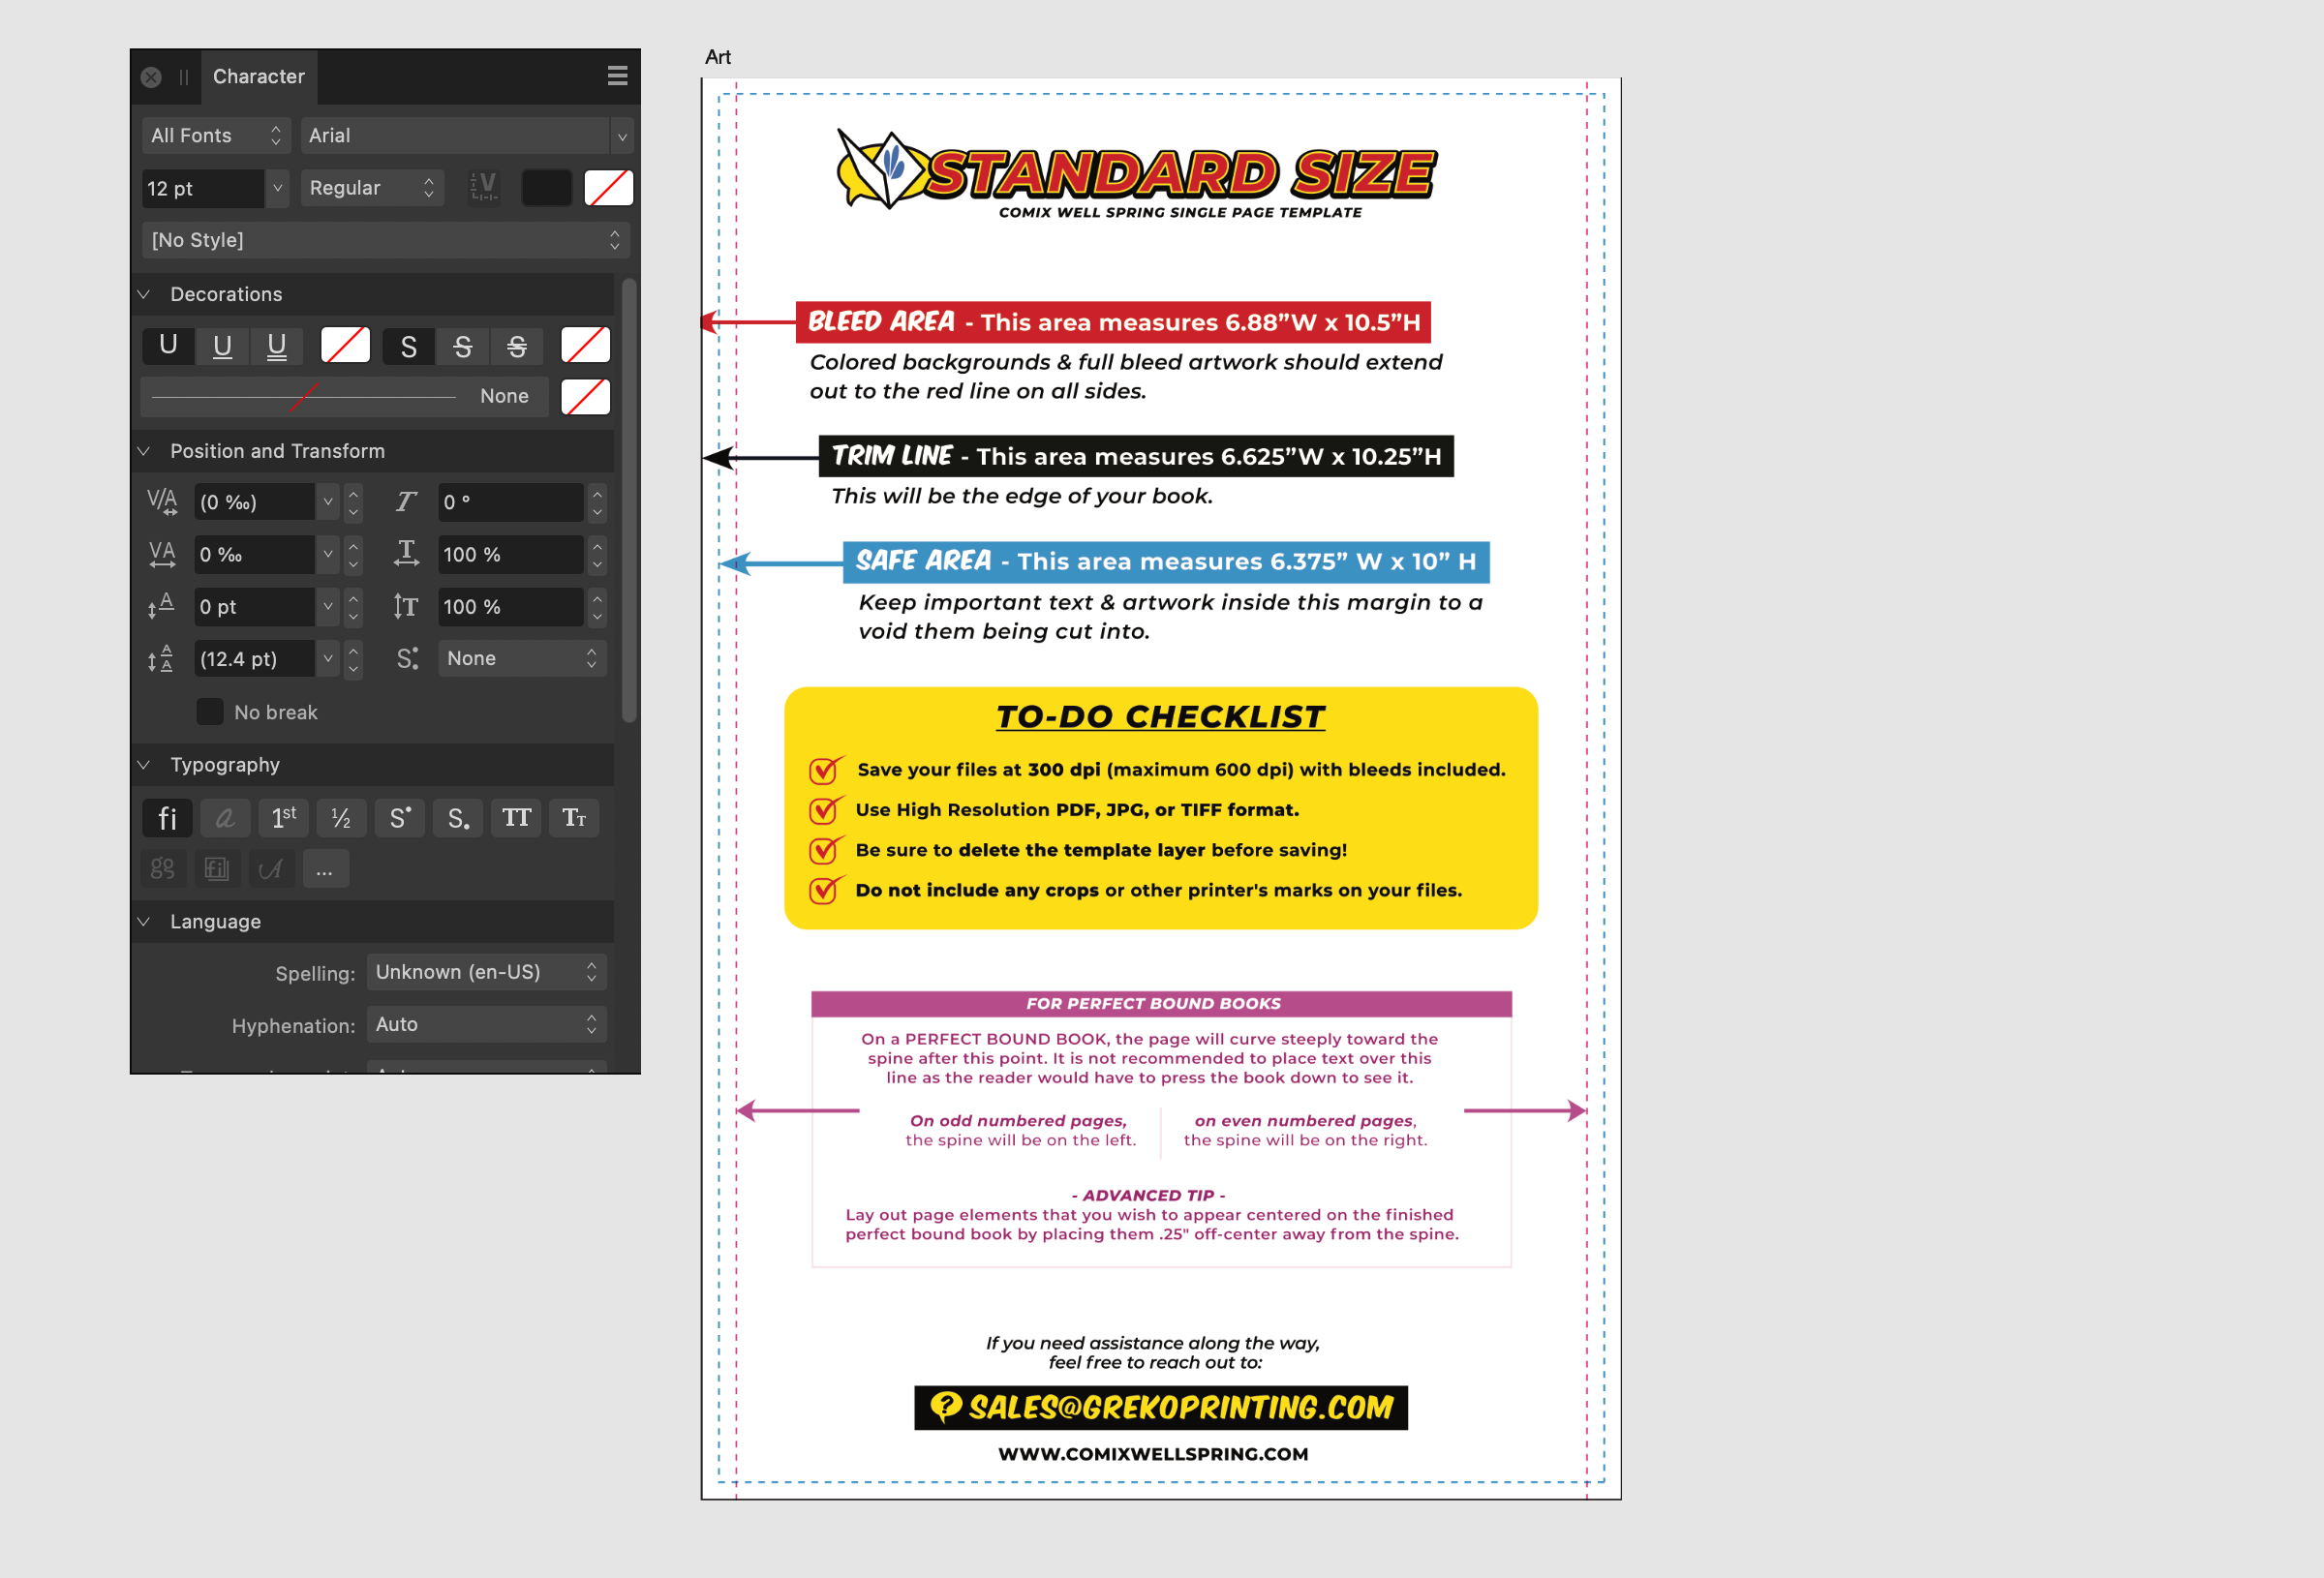
The first thing you’re going to need to do is talk to your printer and get their preferred tech specs. The typical Western comicbook (USA) is trimmed to 6.625in. x 10.25in. However, double-check before getting too deep. Your printer should have their specs posted online or you can email their graphics department.
For this example, I’m using specs from Comix Well Spring. CWS is one of the more popular printer options for upstarts and indies. Check them out!
Use this URL with CWS and get 5% off your first order: https://i.refs.cc/S1TpFFFL?smile_ref=eyJzbWlsZV9zb3VyY2UiOiJzbWlsZV91aSIsInNtaWxlX21lZGl1bSI6IiIsInNtaWxlX2NhbXBhaWduIjoicmVmZXJyYWxfcHJvZ3JhbSIsInNtaWxlX2N1c3RvbWVyX2lkIjo4NTE5NTY0NTl9
Download the Templates
If your printer has templates to download, use those. If not, simply set up your own template file using their specs. In the case of CWS, they provide both: https://www.grekoprinting-comixwellspring.com/specs-templates/
Great. Now we’re going to set up the template file for your book!
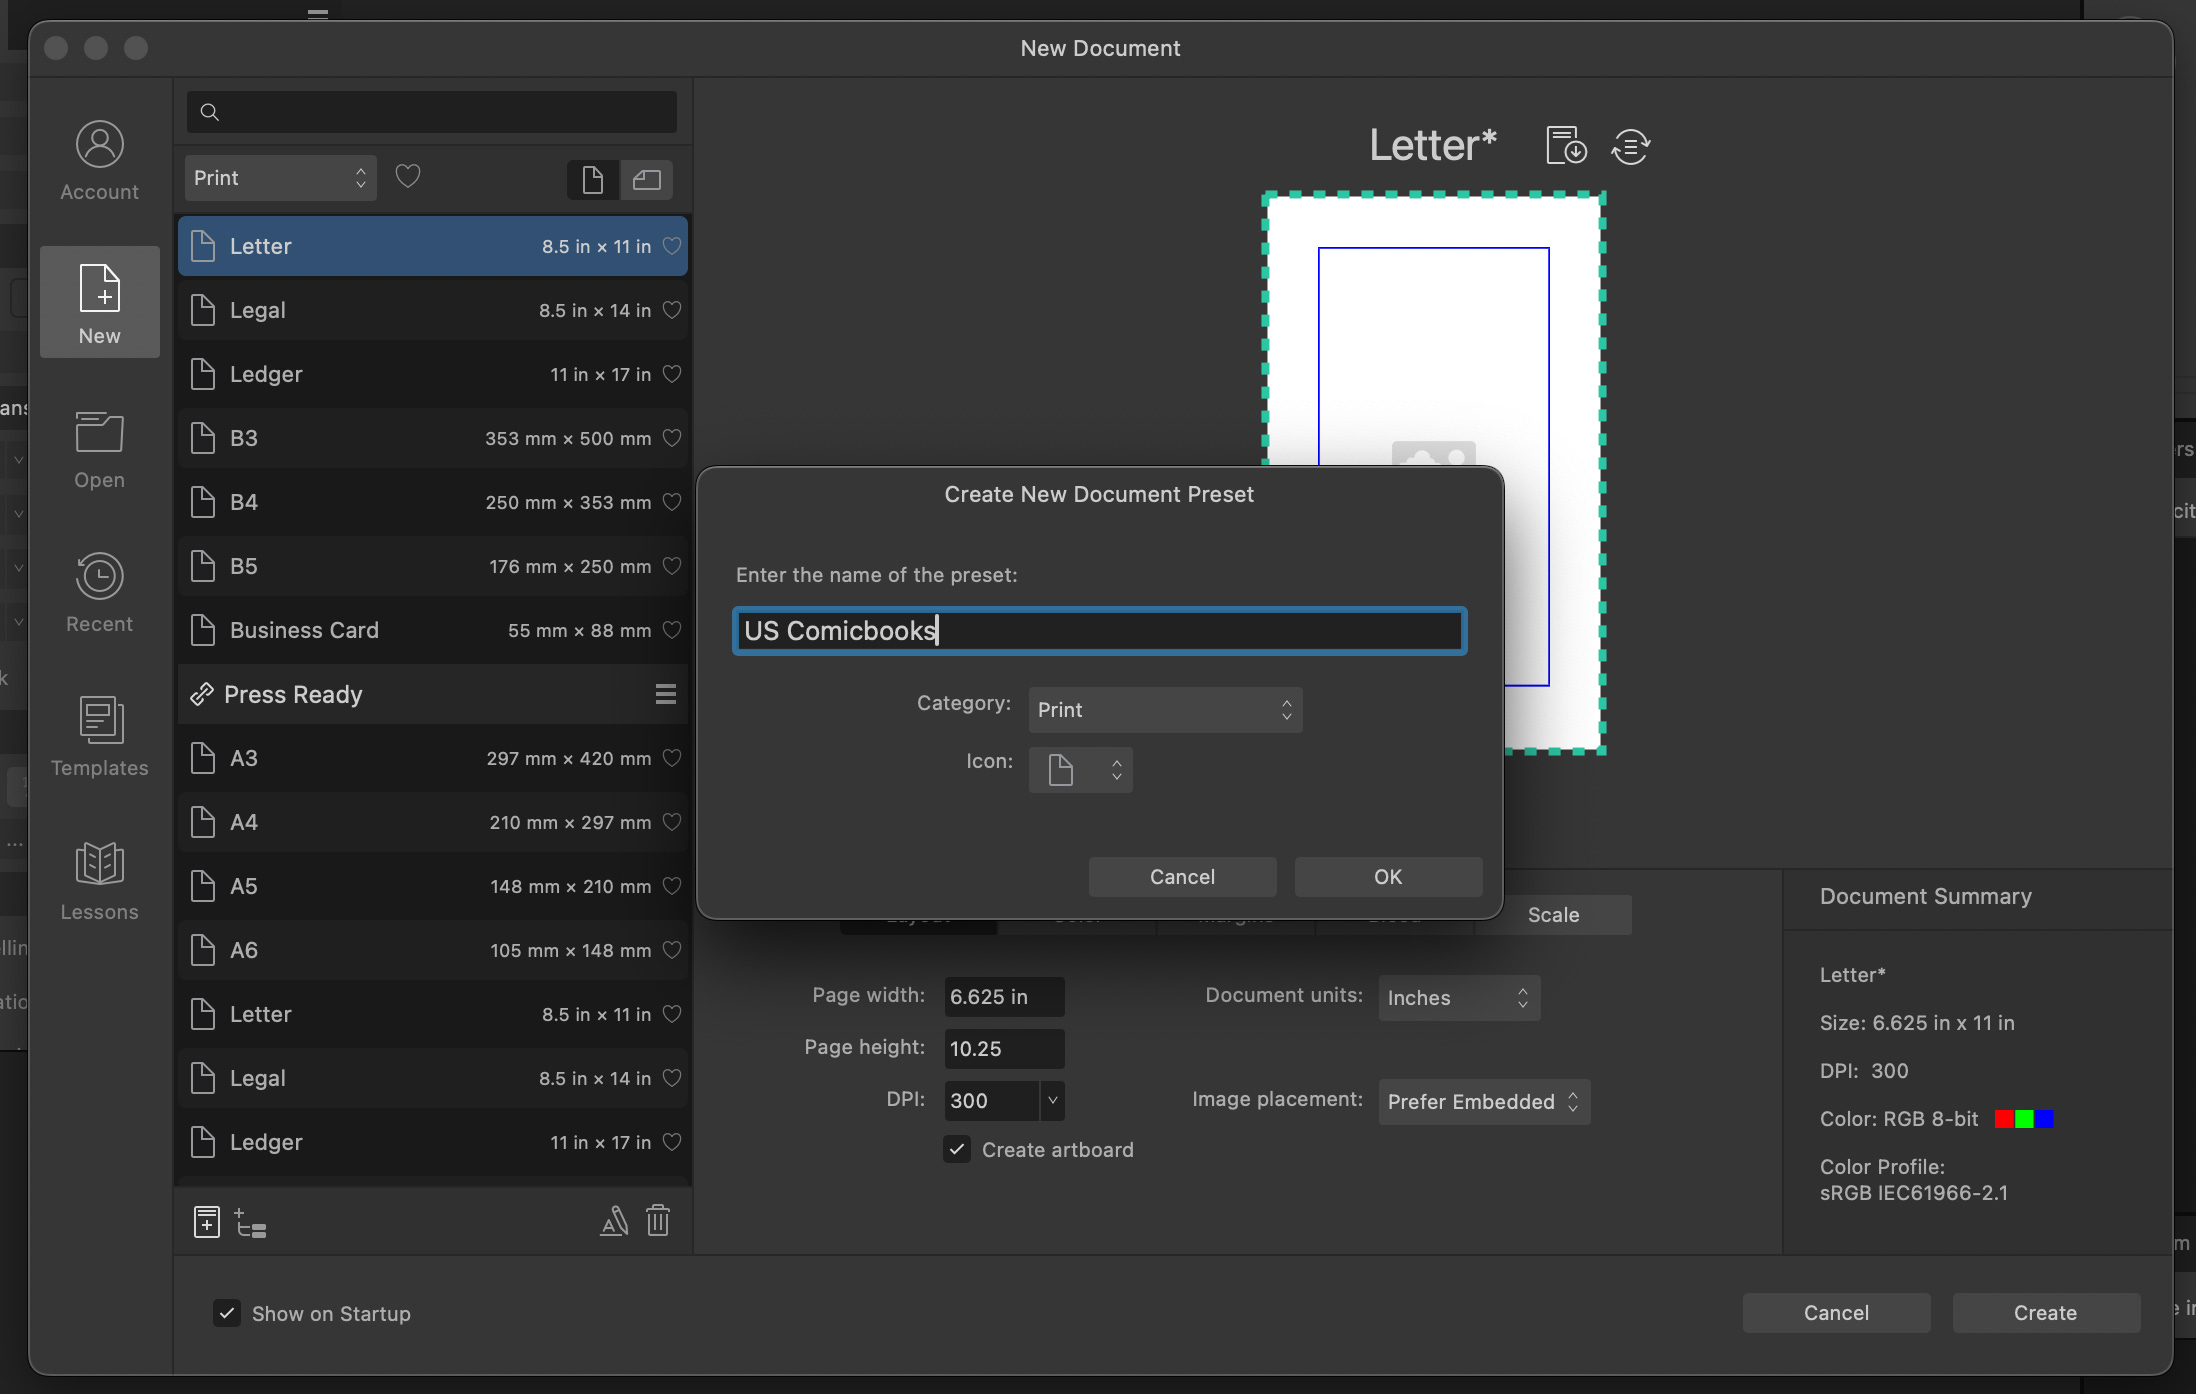
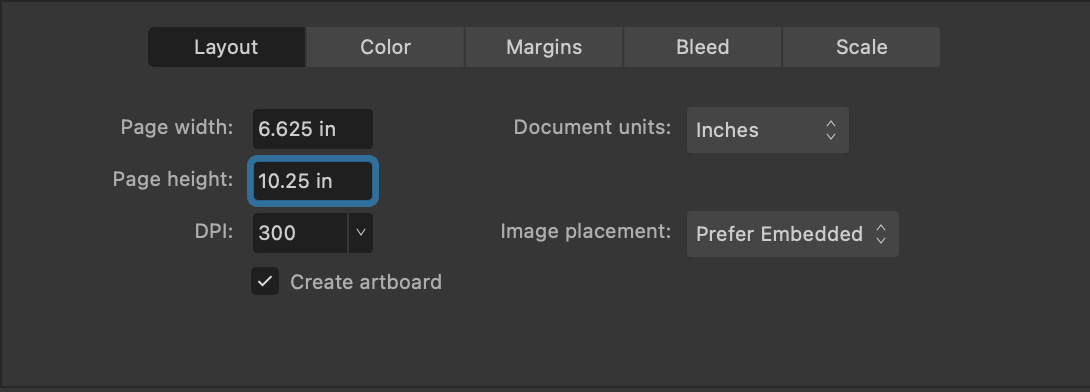
Whether you’re using Affinity Designer 2 or Adobe Illustrator, you’ll want to start with a New Template. Important information for either/both:
6.625in. x 10.25in.
Must be at least 300dpi (I use 300 dpi for comics; anything more is just making a bigger file for no reason).

Ignore Bleeds and Margins for now (we’ll use Guides here)
Color space MUST BE in CMYK — I don’t care if they’re digital printers or offset printers, ink/toner only comes in Cyan, Magenta, Yellow, and Black. RGB is for displays/screens only.
CMYK = print
RGB = light.
If your printer of choice doesn’t recommend a Color Profile, use GRACol 2006

Open your template.
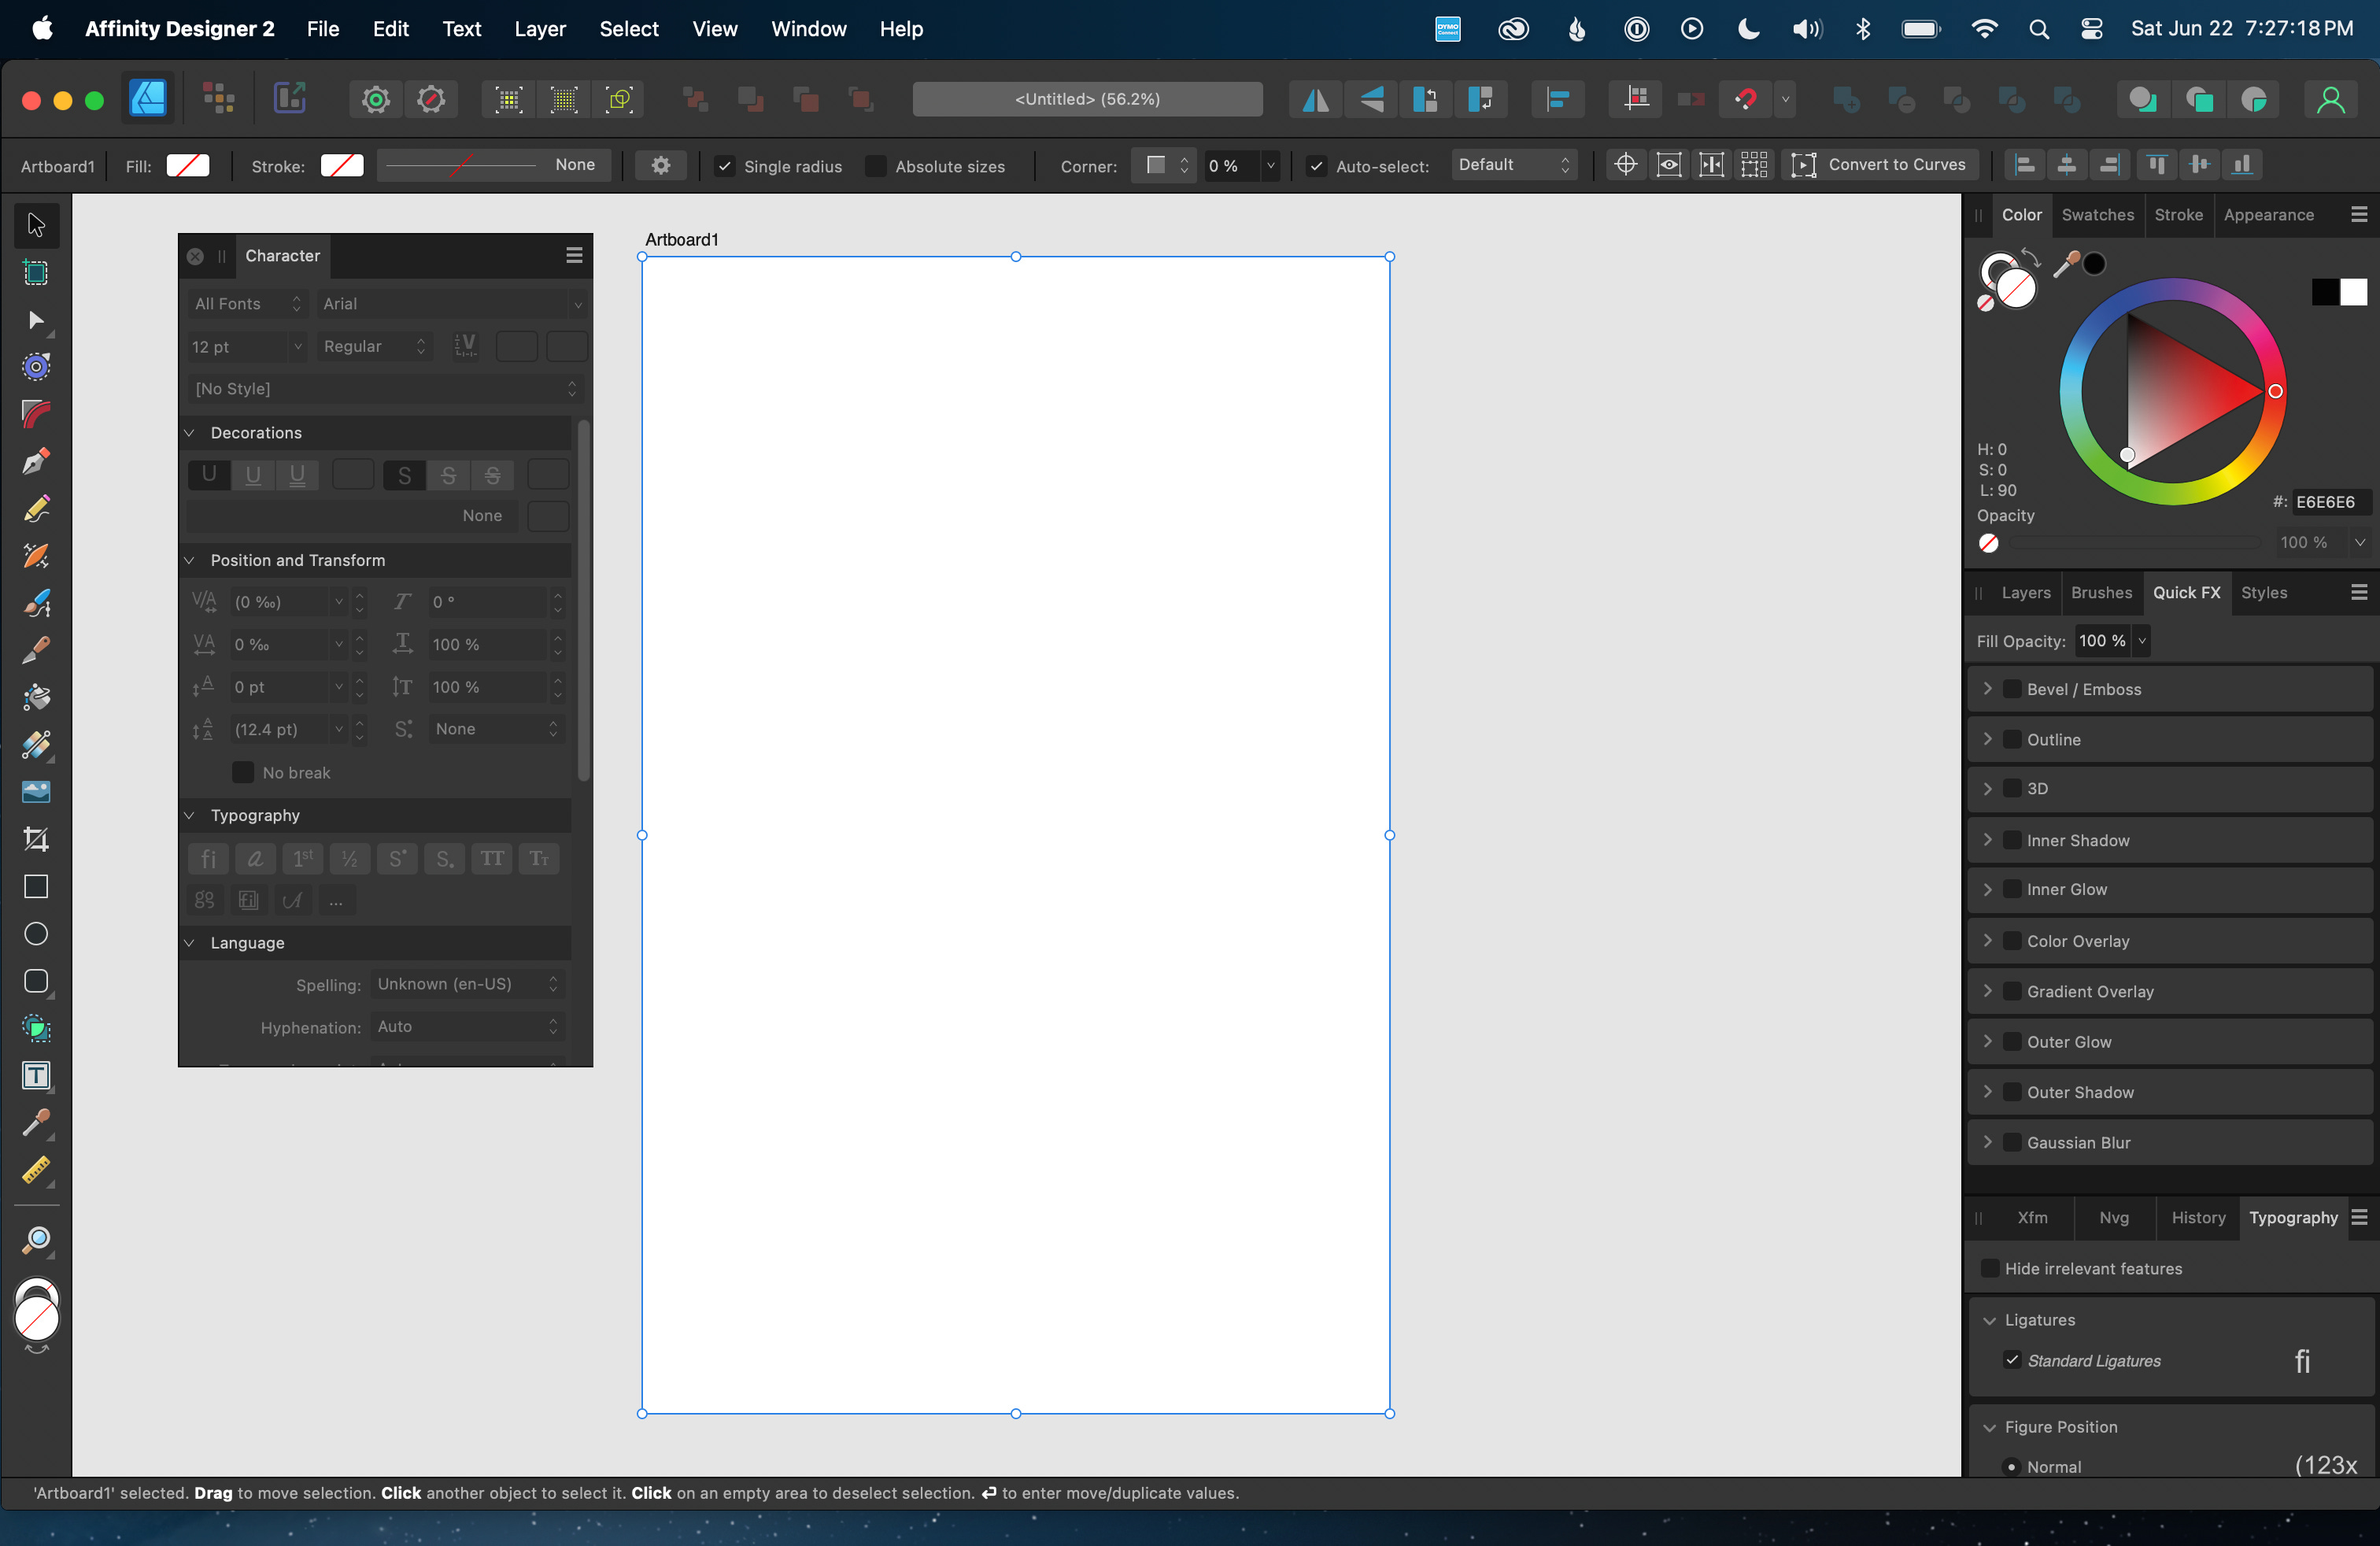
From here I recommend setting up several layers to help you in the future:
Art (bottom layer)
Letters (next layer up)
Dress (above letters)
EFX (above dress)
Template (I import my printer’s template into this layer and hide it after I build guides using it)

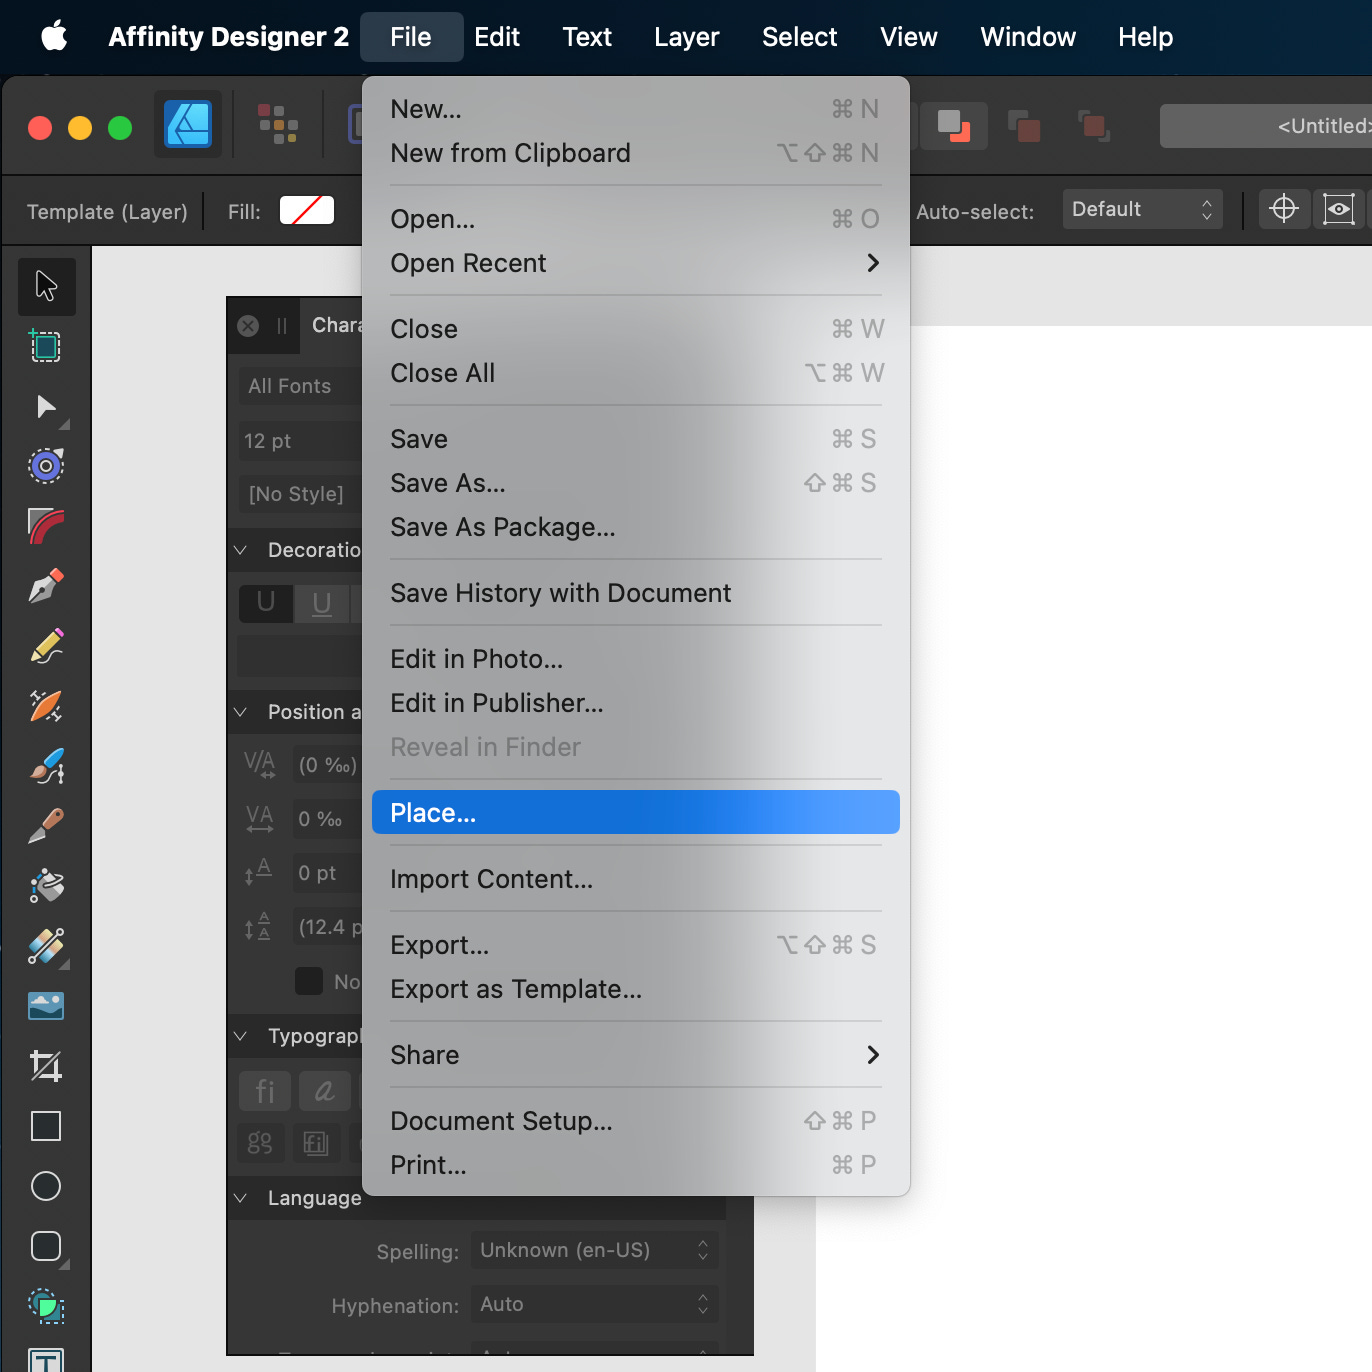
After importing the CWS template and placing it into the Template layer, I use that to mark off my Guides for the other layers. Select File > Place… and choose the template provided by your printer.
Now, I will add the Guides and align them to the markings of this template page.

Now that I’m all set up, I can start placing page art and letters!

If I’m building a full comic I would just duplicate the artboards by however many pages the book is — in this case it’s 20 pages (I do covers separately because that’s how printers prefer the files be done). So I’d just duplicate 20 times (depending on your tool, you may have to rebuild your Guides for each page or each row/column of pages).
Affinity Designer doesn’t seem to offer as seamless and simple an Artboard duplication as Adobe Illustrator, so just be ready for that when you build your file/template. It’ll get better… I’m posting a feature request tonight, in fact. At least it’ll get on the list.
Anyway, many of you will probably use InDesign (Adobe) or Affinity Publisher for the final file so that last note about Artboard duplication may be moot, depending on your workload. I’ve been using Illustrator for 25 years now so I’m more comfortable with that for my full process and workflow. Yes, I’m a dork. And I suck at InDesign.

American Yakuza Acts I-II is in Prelaunch!
Sign up to be notified on launch! We will have an EXCLUSIVE First Day Backer Cover for the first 24hrs!
Exporting
Once you build your comicbook or graphic novel or manga masterpiece in your tool(s) of choice, you’re not done yet.
You still have to export your file for print, based on your printer’s choice of outputs. If you’re exporting to digital, that’s a whole other situation. I’ll write an entire post on preparing your PDFs for digital consumption. It’s not as straightforward as many seem to think, and I’ve seen some awful digital outputs online.
Since we’re using CWS’s template here, let’s stay with their export preferences. This will help ensure your book prints as expected.
These are the preferred export settings to print correctly with Comix Well Spring:


If you use these and print with CWS, you’re very likely to have quick, early success. If your printer does not provide these specs, use the CWS ones for your comics and pay for hardcopy proofs to make sure they print right the first time. NEVER USE DIGITAL PROOFS if you are using a new [to you] printer!
Once you’ve mastered this process with your printer of choice, then you can save some 💵 💵 💵 by switching to digital proofs, but keep this in mind: if you approve a digital proof and you don’t like how it prints, you have a limited argument to get it fixed without incurring additional charges!
Print and Go!
Once you’ve exported your PDF(s) properly and shipped them off to your printer, now you can await your proofs. Make sure your thoroughly review your proofs for errors and print quality. Adjust what you can, and keep moving forward.
Then you can start shipping! That’s a whole other post, altogether…!
LOL
This is a very polite way of saying I’ve fucked up a few times already and you should listen to me to avoid making the same fuck-ups. Because nobody likes a fuck-up.
Thanks for sharing so much helpful information! I’ll be bookmarking this for later.